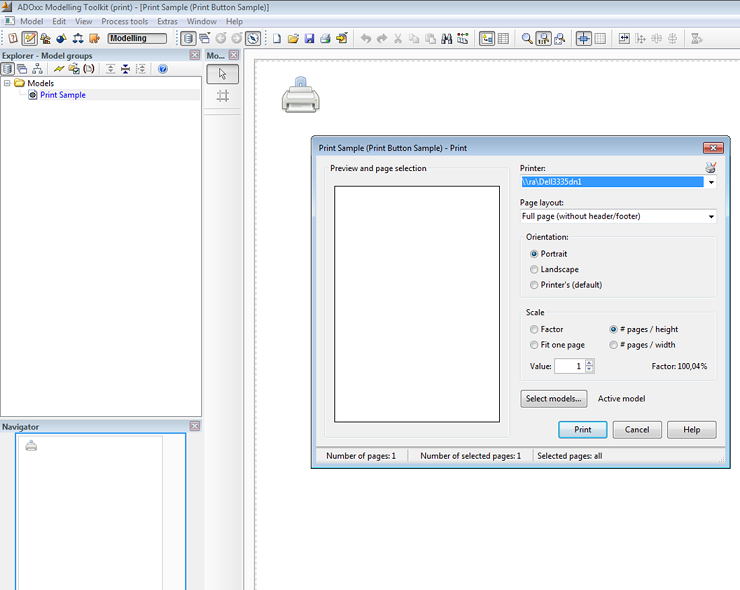
In this package we provide an example of a model type GraphRep which contains a Button that triggers some event. In our case it is a print-button which opens a print dialogue when ckicking on it:
DownloadsThe files below contain an example library (Print Button.abl) and an example model (Print Button demo model.adl). A step-by-step configuration guide is presented in the Hands-On section below. It completely describes how to build this example library.
Print Button.ablPrint Button demo model.adlHands-On1) Create new class __ModelTypeMetaData__
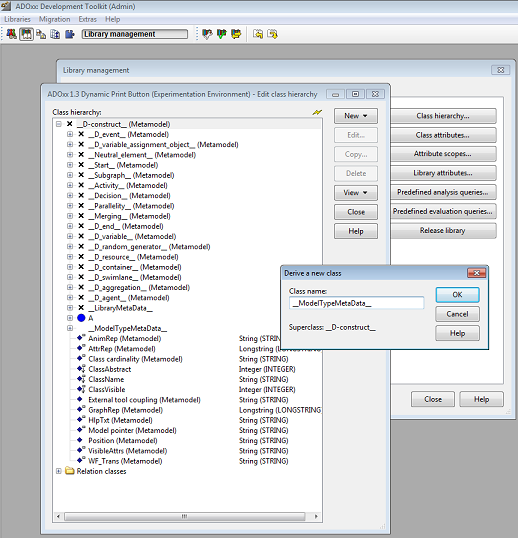
Steps to create class __ModelTypeMetaData__- Go to the Library management, select a dynamic library and click Class hierarchy.
- Click View and select Metamodel.
- Select __D-construct__ (Metamodel)
- Click New --> New class; name it __ModelTypeMetaData__ (two underscore signs!).
2) Add new attribute to class __ModelTypeMetaData__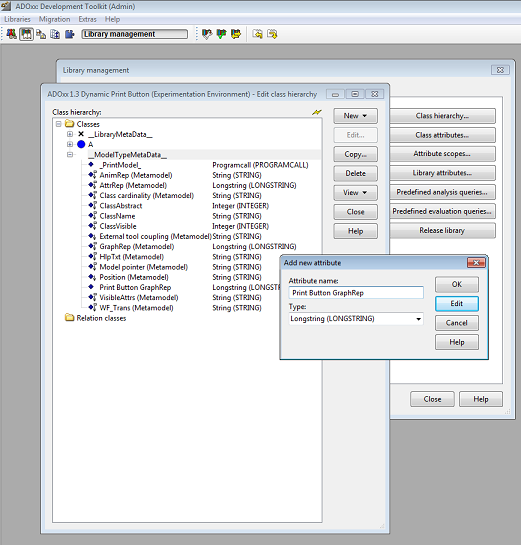 Steps to add attributes to class __ModelTypeMetaData__:
- Select class __ModelTypeMetaData__
- Click New --> New attribute...
- Name new attributes and select type according figure above: (1) name: Print Button GraphRep, type: Longstring.
3) Configure Print Button GraphRep attribute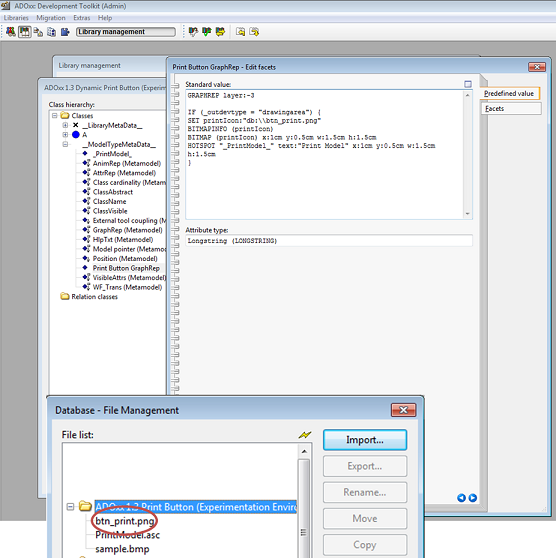
- Double click Print Button GraphRep attribute, set Standard value to:
1GRAPHREP layer:-3
2IF (_outdevtype = "drawingarea") {
3SET printIcon:"db:\\btn_print.png"
4BITMAPINFO (printIcon)
5BITMAP (printIcon) x:1cm y:0.5cm w:1.5cm h:1.5cm
6HOTSPOT "_PrintModel_" text:"Print Model" x:1cm y:0.5cm w:1.5cm h:1.5cm
7}
- Make sure that the file btn_print.png is contained in the database (close the Library management and go to Extras --> File management…).
4) Creating _PrintModel_ attribute (Programcall)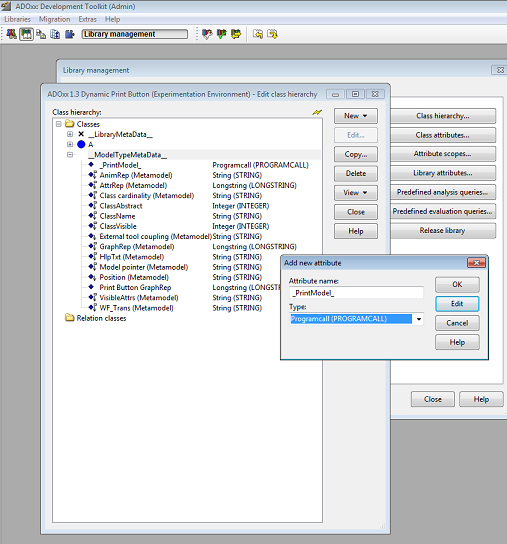
- Select class __ModelTypeMetaData__
- Click New --> New attribute...
- Name new attributes and select type according figure above: (1) name: _PrintModel_, type: Programcall.
5) Configure _PrintModel_ attribute (Programcall)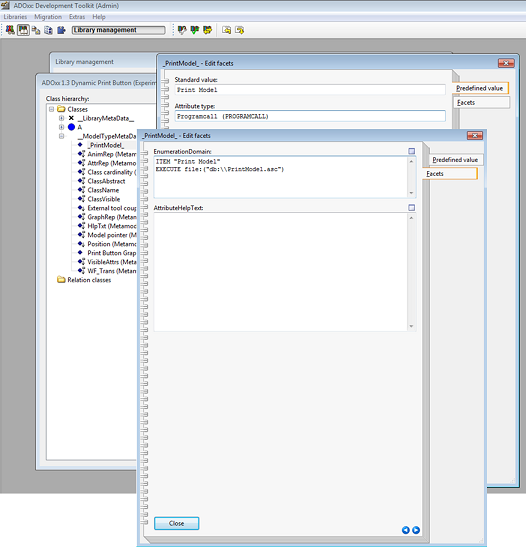
- Double click _PrintModel_ attribute
- Set Standard value to: Print Model
- •Click Facets and set EnumerationDomain to:
1ITEM "Print Model"
2EXECUTE file: ("db:\\PrintModel.asc")
- Make sure that the file PrintModel.asc is contained in the database.
6) Define Model type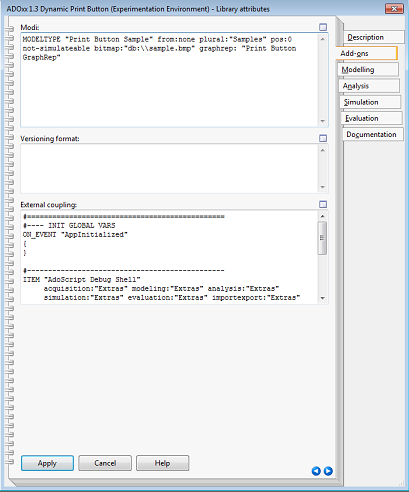
- Go back to the Library management and select your current Dynamic Library.
- Click Library attributes… --> Add-ons and define the following model type according the figure above:
1MODELTYPE "Print Button Sample" from:none plural:"Samples" pos:0 not-simulateable bitmap:"db:\\sample.bmp" graphrep: "Print Button GraphRep"
ResultIn order to see the result, open
Print Button demo model.adl in the ADOxx Modeling Toolkit.
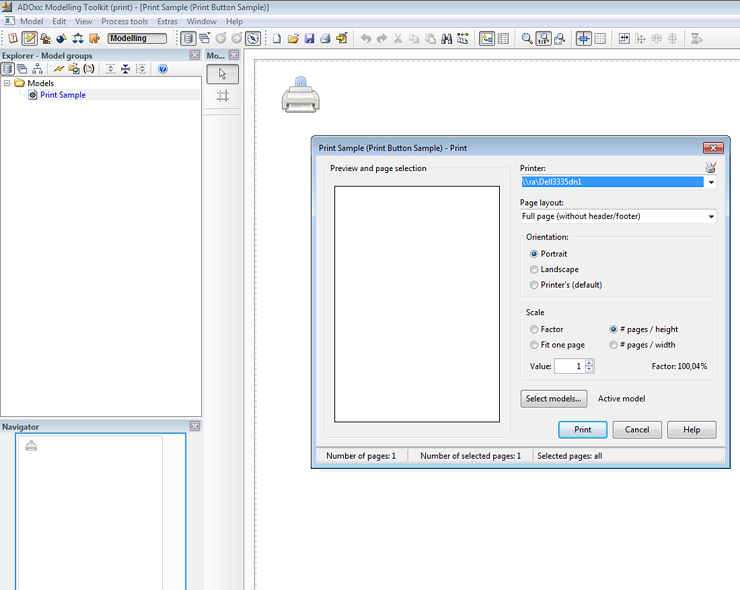
- Clicking the Print Model button triggers (via HOTSPOT command) the Programcall _PrintModel_, which executes the file PrintModel.asc.
- Note, that the print icon (btn_print.png) is represented on the drawing area only.