Installation Guide Windows Vista/7
The installation guide is structured in three chapters:
A. Prerequesites:
Steps needed before starting installation (resources, checks to be done).
B. Database installation:
Step-by-step guidance using screenshots and text on how to install and configure the database runtime system.
C. Tool installation:
Step-by-step guidance using screenshots and text on how to install the tool.
| B. Database installation/preparation: |
The database installation in a Windows Vista/Windows 7 based environment is based on Microsoft's SQL Express 2005 Engine. The installation package is included in the package of ADOxx. Alternatively the database engine can be directly downloaded from Microsoft' website using the URL in the prerequesite section.
HINT: The usage of the distributed package is recommended for issue tracking reasons. - Navigate to SQLExpress [Windows Vista, Windows 7] folder:
The SQL Express installation files can be found in the folder "<ADOXX_PACKAGE>\SQLExpress [Windows Vista, Windows 7]"
 - Start the installation wizard:
Initiate the installation wizard by double clicking on "sqlexpress2005.exe" or "sqlexpress2008.exe" respectively. In the following the installation and configuration settings for Microsoft SQL Express 2005 are provided. In case you proceed with Microsoft SQL Express 2008, the settings are similiar, but the look and feel of the installation wizard are different. - Accept license agreement:
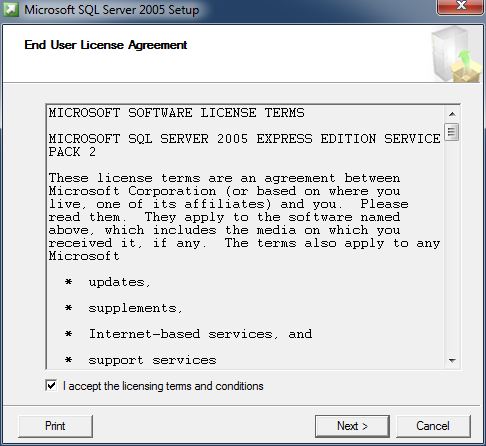
Accept the license agreement by marking the check box and select "Next" - Native client and support files:
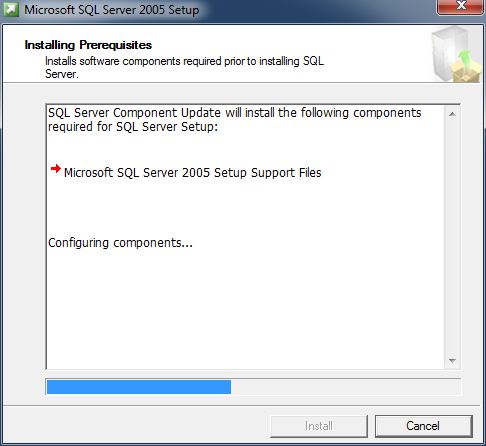
Install the Native Client and Support Files as a Basis for SQL Server Installation by clicking on "Install" - System configuration check:
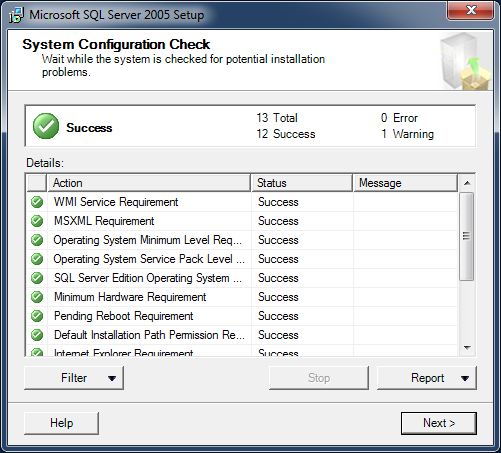
Following the installation a System Configuration Check is performed, analyzing the compatibility of your system with the installation requirements. Errors (preventing the installation, please cross-check with Microsoft SQL Server Express 2005 minimum requirements on http://www.microsoft.com/sqlserver/2005/en/us/system-requirements.aspx) and warning are provided. - Registration information and advanced configuration:
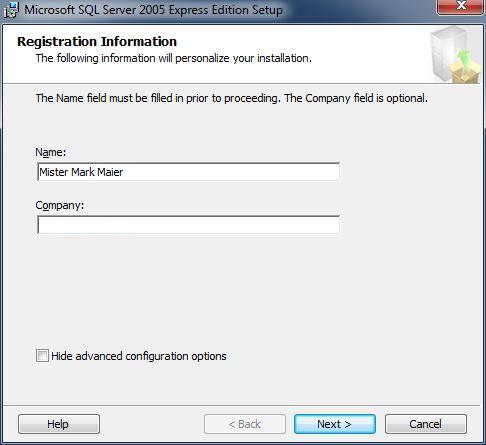
Provide registration information in the following screen and
UNCHECK "Hide advanced configuration options".
Unhiding the advanced options allows the configuration of the database instance to run ADOxx. - Feature selection:
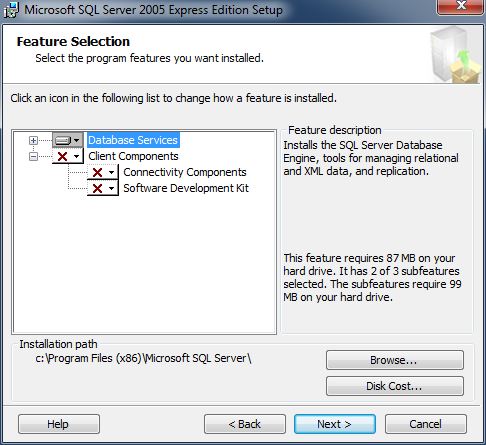
Accept the defaults on the feature selection screen. - Instance name:
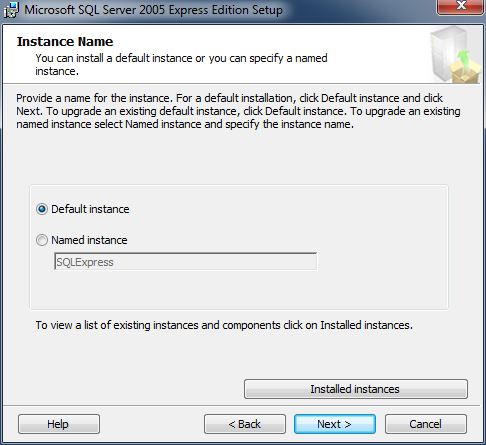
Make sure that the instance is installed as the "Default Instance". ADOxx in the standalone configuration can only connect to the Default Instance. - Service account name:
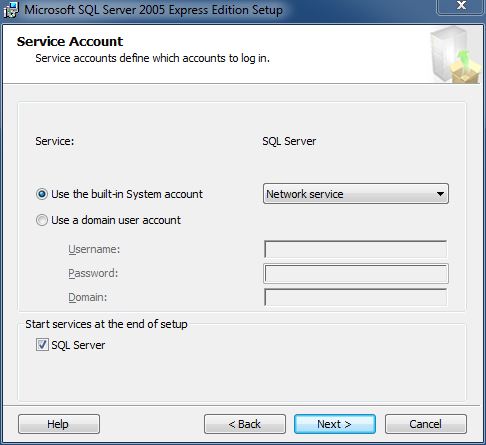
Accept the defaults on the Service Account Screen - Authentification mode:
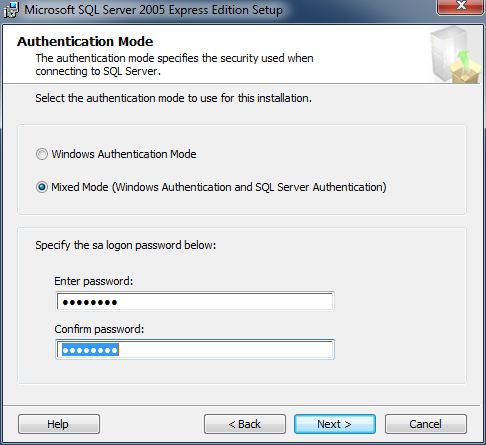
Select "Mixed Mode" as the authentification mode for connecting to the instance. Enter a password of your choice for the "sa" user (during the ADOxx installation this password needs to be entered to initialize the database). - Collation settings:
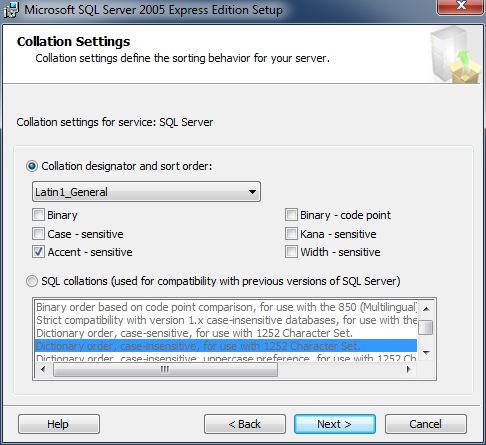
Accept the defaults on the Collation Settings screen (this settings represent the "non-unicode" settings of your PC). - Installation procedure:
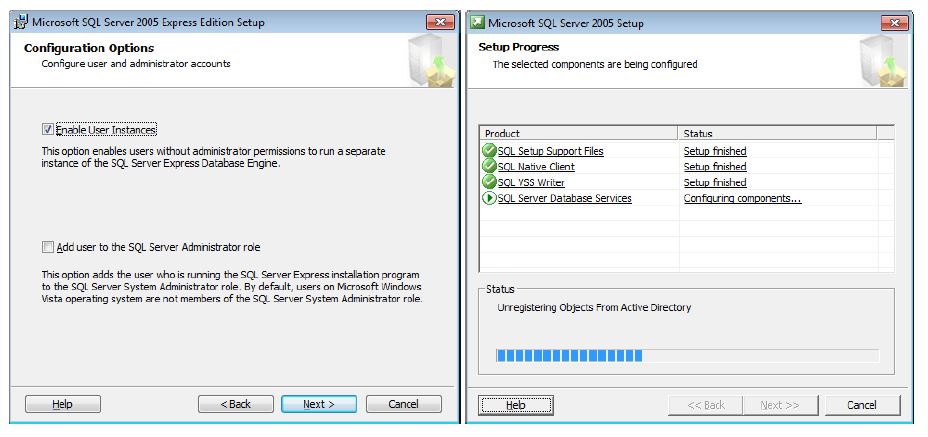
Accept the defaults on the User Instance screen and trigger the installation process. Press "Finish" after successful installation. Your system is now ready for the installation of the ADOxx based tool |
Back to Installation Guides
 www.adoxx.org