Non-Latin Database Instance Installation Guide
The default installation uses "Latin1_General_CS_AS" as the default collation of the database. In case you want to run a different collation, please setup a database instance "ADOXX15EN" with your desired collation in advance!
This installation guide is applicable in case you want to use a different collation then the default "Latin1_General_CS_AS" for your installation.
| Database Installation/Preparation: |
The database installation is based on Microsoft's SQL Express 2008 Engine. The installation file is included in the package of ADOxx. Alternatively the database engine can be directly downloaded from Microsoft' website (e.g. Microsoft SQL Server 2012 Express)
HINT: The usage of the distributed package is recommended for issue tracking reasons. - Navigate to "SQLExpress" folder:
The SQL Express installation files can be found in the folder "<ADOXX_PACKAGE>\SQLExpress [Windows Vista, Windows 7]"
 - Start the installation wizard:
Initiate the installation wizard by double clicking on "sqlexpress.exe". The installation files are extracted and the "SQL Server Installation Center" is started.
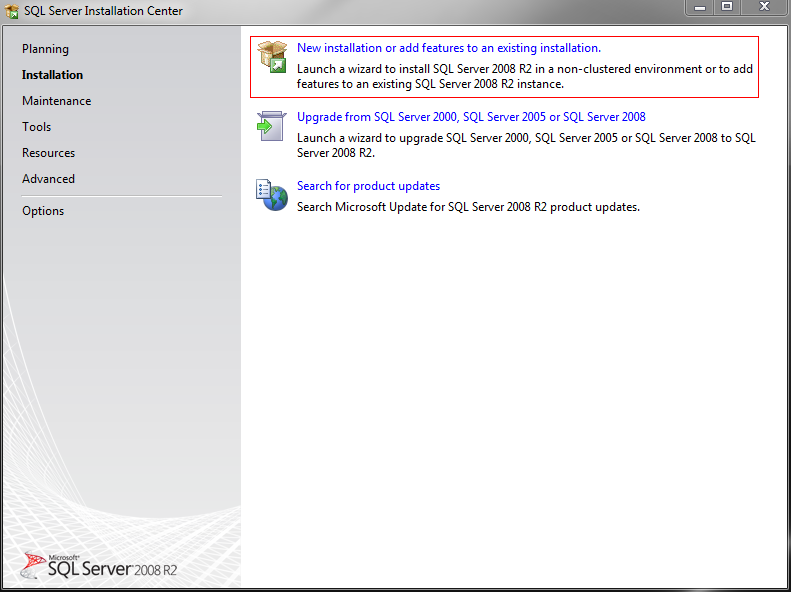
Select "New installation of add feature to an existing installation" to create the new instance
-
Define installation type
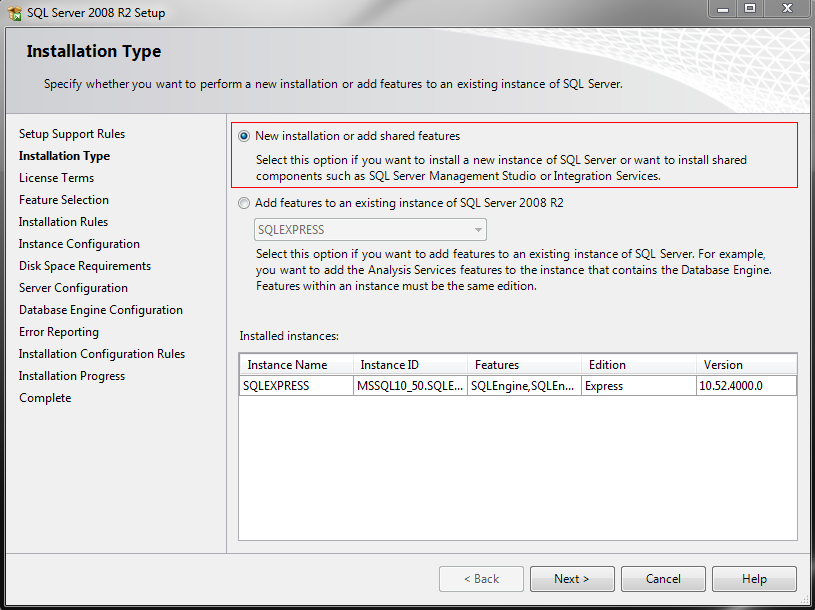
Select "New installation or add shared features" to create a new instance/engine. Available instances are listed below. - Accept license terms:
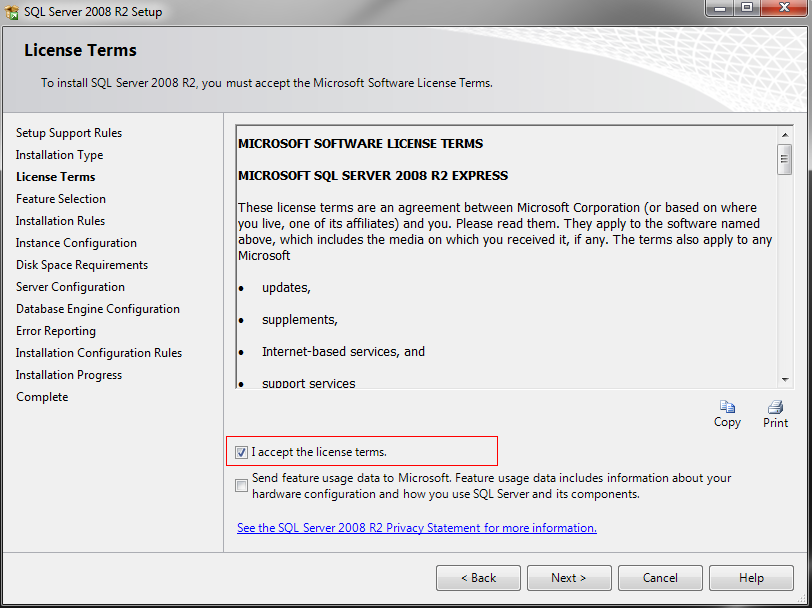
Accept the license terms by marking the check box and select "Next" - Select necessary features (default):
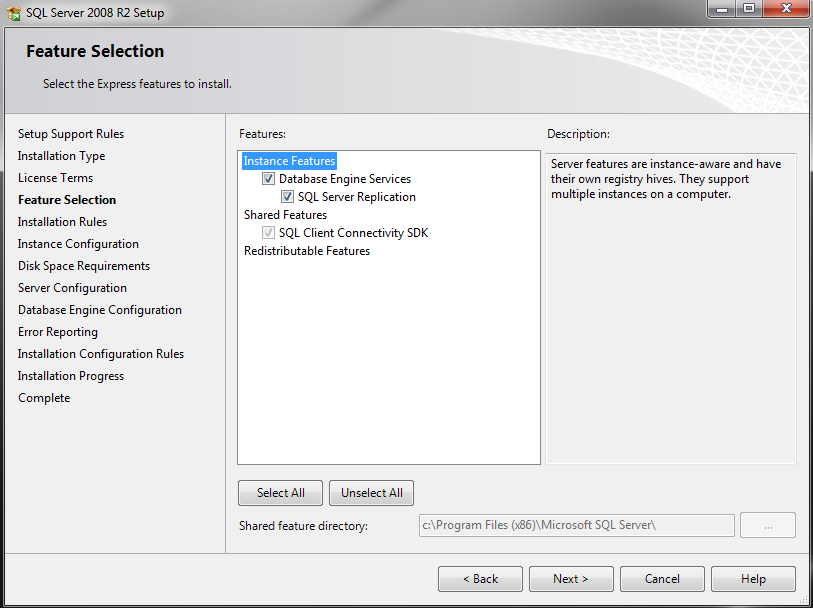
Select the necessary features - default value can be confirmed. - Instance configuration:
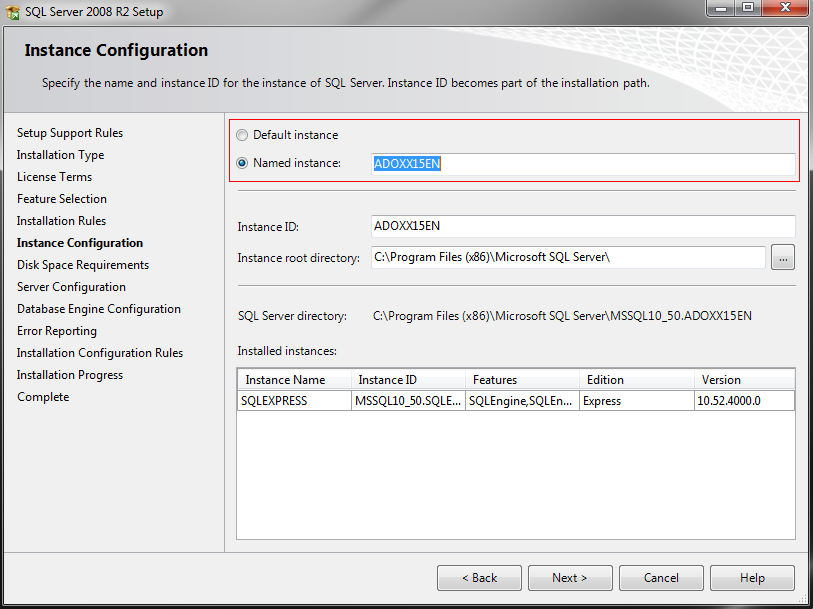
Configure the new instance by using the name "ADOXX15EN". The ADOxx installation wizard will look for this instance - use the exact same name and capitalization. - Server Configuration:
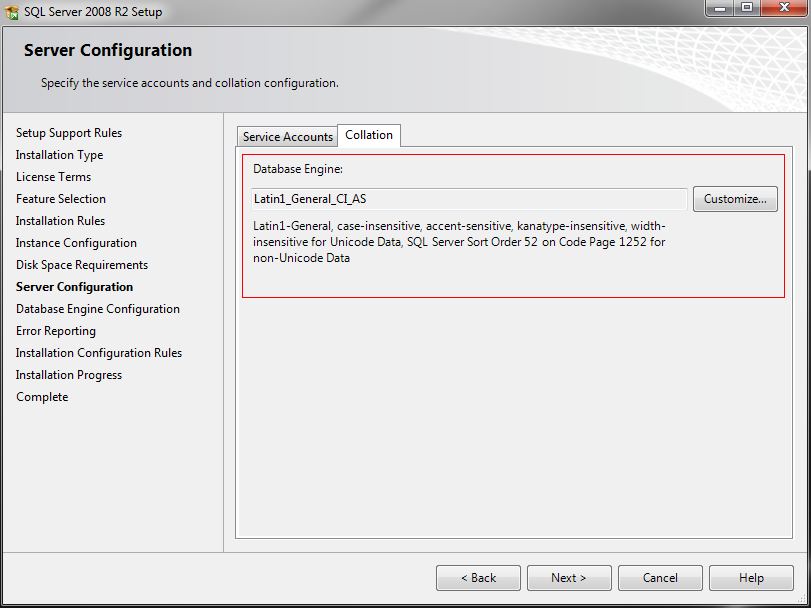
Switch to the "Collation" tab and define the collation of your choice. Since ADOxx is a non-unicode programme, the Windows code page has to be support/matched to the database collation. Validate this setting in "Control Panel" -> "Region and Language Settings" -> "Advanced"
- Database Engine Configuration:
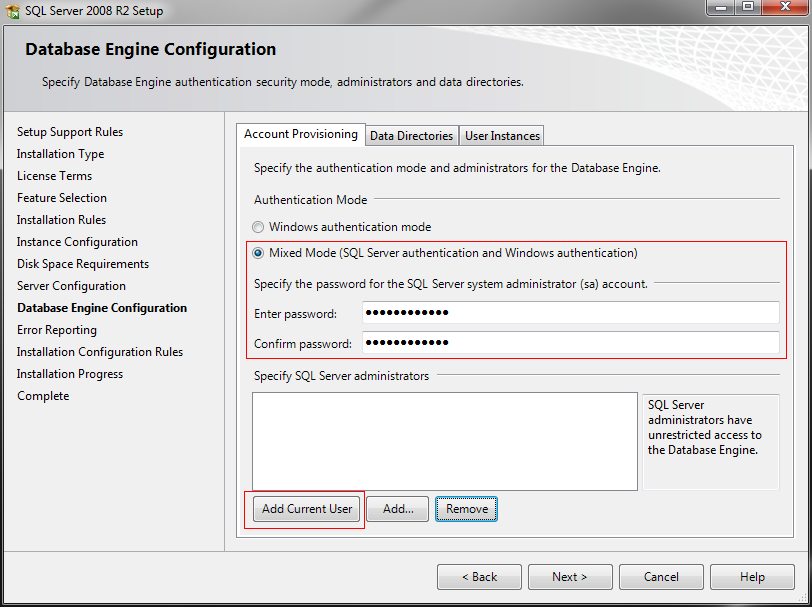
Change the authentication mode to "Mixed Mode" and enter a password of your choice (default password of the installation wizard is "12+*ADOxx*+34", in case you use a different password, the wizard will ask you to enter this password. To make the instance also accessible as a Windows user click on "Add current User". - Error Reporting (default values):
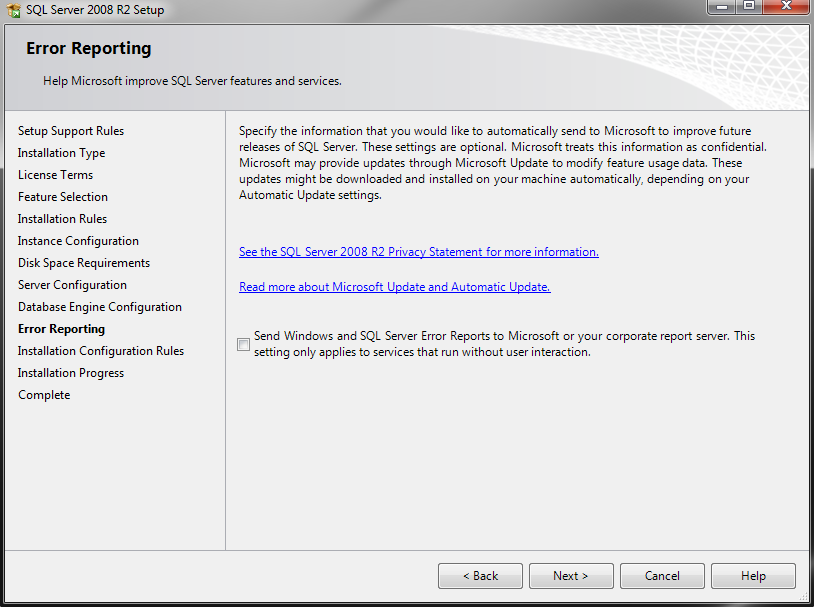
Mark whether you want to provide error reports to Microsoft. - Installation Progress:
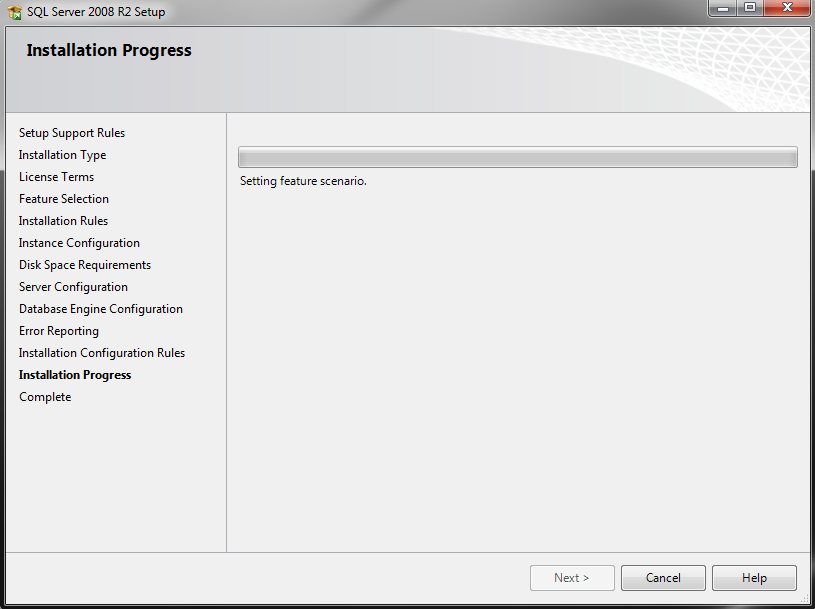
The installation is performed - time for a cup of coffee now. - Success message:
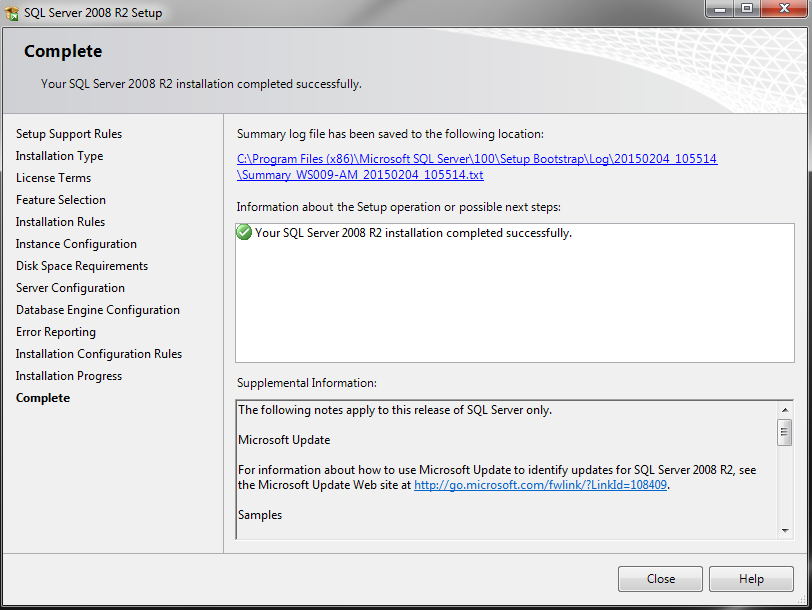
The installation is completed. Click on "Close"! Your system is now ready for the installation of the ADOxx based tool -
Trigger a new installation by following the New installation of ADOxx 1.5 guide. |
Back to Installation Guides
 Database Instance Setup - Non-Latin Collation
  www.adoxx.org