 Remote Model Documentation
 EXTEND: Remote Model Documentation
In the following we describe the steps to take to a) extend the remote documentation building block by adding/updating report formats and b) deploying the new version in your own infrastructure at ADOxx.org.
1. Setup of Development Environment
The proposed development environment consists of the following tools and technologies:
- Eclipse IDE for Java EE Developer: As an integrated development environment, we propose to use the Eclipse EE environment. The necessary plugins are listed as technologies below. The version used for this documentation is "Mars."
- Maven: As a build and dependency management environment. In case you are new to Maven, have a look a the brief introduction online (Maven in 5 minutes). The necessary plugin for Eclipse is available here.
- Apache Cocoon: As the transformation framework used for the Remote Documentation Building Block. Apache Cocoon enables transformation of structure content using a pipeline approach. Further details are available here. Specific Maven Archetypes for Apache Cocoon are available in the repository.
- Java: As the baseline technology for realizing the building block. The tested/used version is Java JDK 7.
- SVN: The source code of this building block is maintained in the ADOxx.org SVN Repository. Make sure to have the SVN plugin for Eclipse installed to check-out and commit directly from within your IDE.
As a prerequesite to get started, make sure to have the Eclipse IDE up and running and the necessary connectors/plugins for Maven and SVN installed.
2. Check-out Remote Documentation Projects from SVN
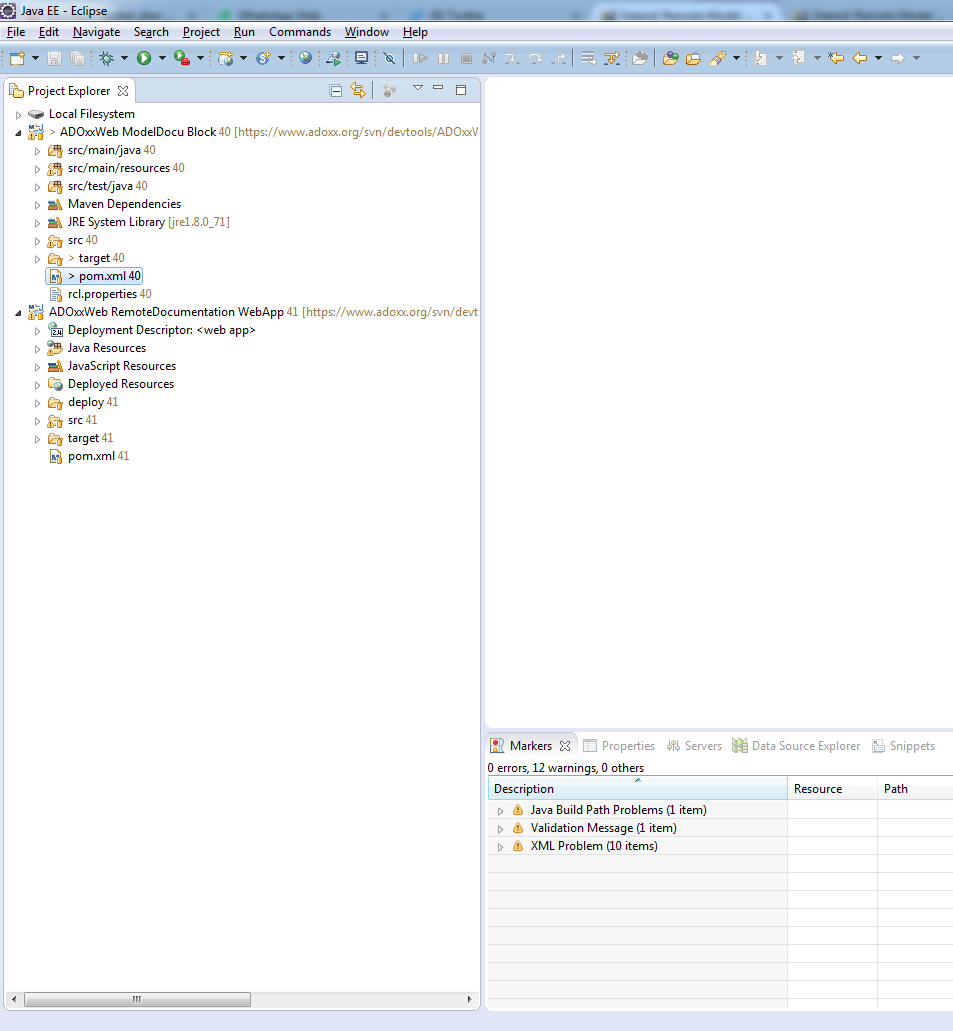
The Remote Documentation Building Block consists of 2 projects, depending on each other:
- ADOxxWeb Remote Documentation WebApp: This project is used to wrap Apache Cocoon Blocks into a web application. A specific archetype is used for this project. The project is accessible in the SVN at: https://www.adoxx.org/svn/devtools/2 ADOxx Building Blocks/1 Remote Model Documentation/ADOxxWeb RemoteDocumentation WebApp/
- ADOxxWeb ModelDocu Block: This project is the actual implementation of Apache Cocoon pipelines for model content transformation to documentation. The project is accessible in the SVN at: https://www.adoxx.org/svn/devtools/2 ADOxx Building Blocks/1 Remote Model Documentation/ADOxxWeb ModelDocu Block/
As an initial step, check-out the projects in the Eclipse IDE:
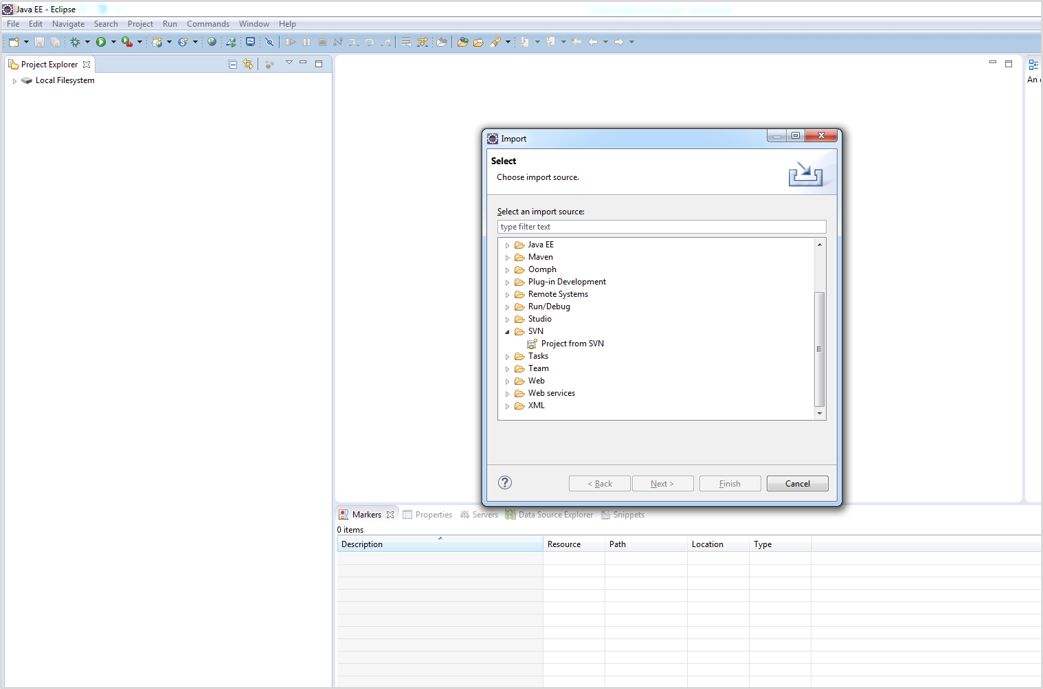
A. Right-click in the project explorer, select "Import" -> "Import project from SVN"

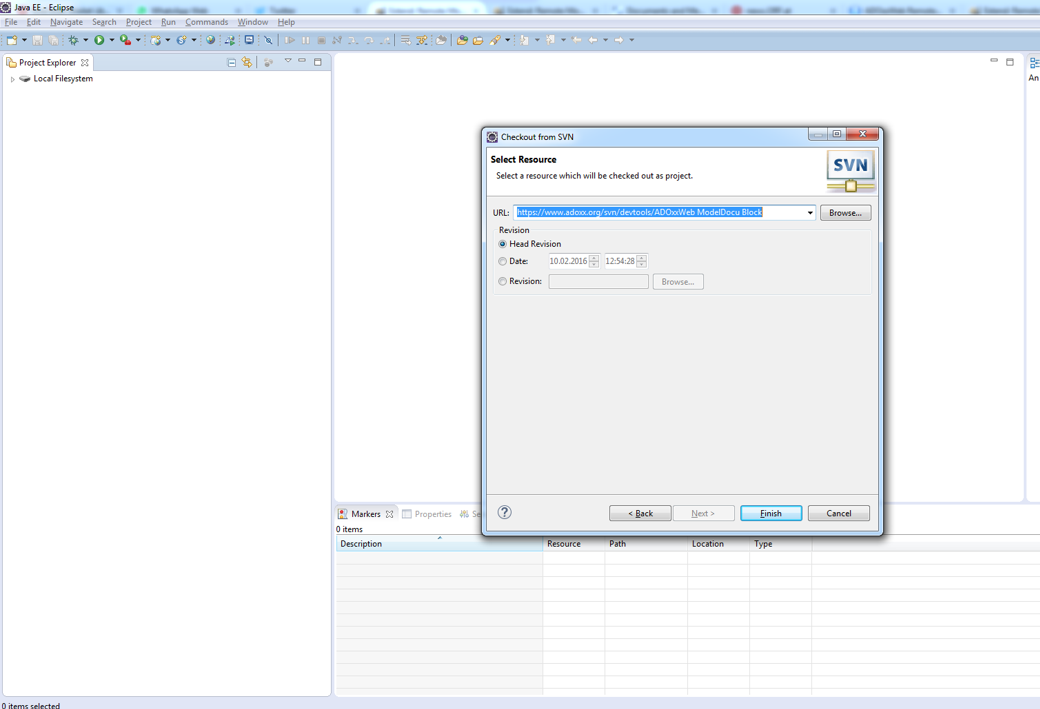
B. Enter the URL of the project (as listed above). Since the ADOxx.org SVN is public, no username or password is needed.

C. Click on Next and Finish to trigger the checkout (in the next steps you can configure the name of the project in Eclipse. In case you want to update, please use the respective wizard steps).
Repeat steps A-C for the other project. Both projects need to be available locally, as there is a dependency (in Maven) between the Webapp and the Block.

3. Perform an Initial Build/Resolve Dependencies
As a preparation action, make sure that the 2 projects are correctly resolving dependencies and are installed in the local Maven repository. These steps are performed by:
A. Right-click on the project -> "Run as" -> "Maven build..."
In the "Goals" field enter "clean install." Click on "Run" to trigger the clean-up of the project first, and then the installation of the projects (installing implies the resolution of dependencies).
B. Review the console log. In case of error statements, you can re-run the build and add -X to have a full log of all activities.
4. Validate Debug/Development Deployment
For local validation and debugging, you can start the modeldocu only in a Apache Jetty Container.
A. Right-click the ADOxxWeb ModelDocu Block project and select "Run as" -> "Maven build..."
B. In the goals field, enter "jetty:run" and click on "Run". The block is deployed in the container and is accessible at http://localhost:9999/modeldocu.
An important aspect is that this enables the debugging of a block directly, the wrapper web application should be used for productive deployment (e.g. WAR file on Apache Tomcat).
C. Create a WAR file for Productive Deployment
To create a deployable WAR file, right-click on the ADOxxWeb RemoteDocumentation WebApp project, select "Run as" and "Maven build ...". Enter "clean install" in the "Goals" field and hit "Run".
This creates a new WAR file in the "target" folder of the project. Use this WAR file to deploy it in a e.g. Apache Tomcat container.
D. Update the URL of the AdoScript Client
When deploying in your own infrastructure, you need to update the client configuration in your Modelling Tool.
#################################################################
 ######## REMOTE DOCUMENTATION TRIGGER ########
 #################################################################
 ITEM "Create remote documentation" importexport:"Documentation"
 SETG sRemoteDocumentationURL:"YOUR_URL_HERE"
 EXECUTE file:("db:\\RemoteDocumentation.asc"
In case you receive error messages during the Maven builds, such as "No compiler is provided in this environment": Perhaps you are running on a JRE rather than a JDK?", make sure that you have a JDK installed and on the build path.
 Basic Example: Add a new Report
As an application case and to familiarize yourself with the extension possibilities for this building block, this walk-through provides an explanation of the steps and artifacts to add a new report to the building block.
A. Add a new Report to the Registry:
Each report provided by the service needs to be registered. Reports are registered in a common format, providing configuration and pipeline information. The registry is available as an XML file, stored in the 'src/main/resources/COB-INF/registry/registry.xml' file.
<report>
<name>PDF (Content, Single)</name>
<format>*.pdf</format>
<filedesc>PDF</filedesc>
<multi-select>0</multi-select>
<pipeline>modelContentPDF/MODELID/</pipeline>
</report>
<report> : for each report configuration, a new report tag is added to the file
<name> : the human readable report name, displayed for user selection in ADOxx-based tool
<format> : the file type to be used for this report, starting with a *. and the file extension)
<filedesc> : a readable file description for display in the export dialog
<multi-select> : 1|0 as a boolean value, if multiple models should be selected
<pipeline> : matcher to be used for the export/download of the report. This pipeline has to be available in the engine (sitemap.xmap) In case a single model is exported and is used in the pipeline, use MODELID as a placeholder.
Extend the report registry by adding the following snipplet to the registry at 'src/main/resources/COB-INF/registry/registry.xml':
<report>
<name>My own Report (PDF)</name>
<format>*.pdf</format>
<filedesc>PDF</filedesc>
<multi-select>1</multi-select>
<pipeline>modelContentmyReport/</pipeline>
</report>
Our new report is defined to result in an PDF output, multiple models should be selectable and the transformation is performed in a pipeline called "modelContentmyReport".
As this pipeline is not available yet, we have to add it to the sitemap.xmap.
B. Add Transformation Pipeline
The transformation of the models are defined in the 'src/main/resources/COB-INF/sitemap.xmap' file. The 'sitemap.xmap' file is structured as follows:
  <map:sitemap xmlns:map="http://apache.org/cocoon/sitemap/1.0">
    <map:components/>
    <map:views/>
    <map:resources/>
    <map:action-sets/>
    <map:pipelines/>
  </map:sitemap>
The stucture of the sitemap.xmap is explained in detail here.
In the pipelines section of the file we add a new one to the <map:pipeline id="modeldocu">:
  <map:match pattern="*/modelContentmyReport/*/*">
    <map:generate src="content/{1}/models.xml" type="file" />
    <map:transform src="transform/removeNamespace.xsl" />
    <map:transform src="transform/modelContentmyReport.xsl">
      <!--<map:parameter name="selectedModel" value="{2}" />-->
    </map:transform>
    <map:serialize type="fo2pdf" />
  </map:match>
Our pipeline consists of
- match pattern: This pattern is used to identify which pattern to use for a request
- generate: The generator prepares the model content. The default one is to retrieve the file from the upload, and use the GUID parameter {1} to retrieve the correct one.
<map:generate src="content/{1}/models.xml" type="file" /> - transform: These statements can be sequential and perform the transformations. In our case, we perform a default transformation to remove namespaces first and then do the actual transformation. As we want to produce a PDF, an FO XML file has to be produced. In case parameters are needed, they can be handed-over to the transformation from the request (see example, where {2} request parameter is handed over)
- serialize: Performs the type specific serialization on the outcome of the transform tasks.
To have the pipelines ready, make sure that all resources, such as transformation files, are accessible and within the folders. An example for the XSL-tranformation, which is called within the pipeline above, can be downloaded at the following link: modelContentmyReport.xsl
 Complex Example: Modelling Language Specific Report
In this case, we extend the report to produce a more complex format. The difference to the previous one is that this format depends on the modelling language, meaning that specific constructs need to be available in order to generate the report/format intended. We specifically build on the application library which was developed in the CloudSocket.eu project. This report will be applied to the results of the "Cause & Effect" Modeltype of the tool, producing the so called CockpitXML report. This format can be used as input for the Dashboard Building Block (see dashboard example).
A. Prerequesites: Make sure to download the CloudSocket Application Library, import it into your ADOxx Development Environment, and enable Remote Documentation (See Video Tutorial)
B. Add new Report: Similiar to the above example, add the new report to the registry
<report>
   <name>COCKPIT</name>
   <format>*.xml</format>
   <filedesc>XML</filedesc>
   <multi-select>0</multi-select>
   <pipeline>modelContentCOCKPIT/</pipeline>
 </report>
C. Update the sitemap.xmap: For transforming the adoXML to cockpitXML, we have to add a match node within the pipeline: 'modeldocu'. where the transformer 'modelContentCOCKPIT.xsl' is triggered.
  <map:match pattern="*/modelContentCOCKPIT/*/*">
    <map:generate src="content/{1}/models.xml" type="file" />
    <map:transform src="transform/removeNamespace.xsl" />
    <map:transform src="transform/modelContentCOCKPIT.xsl">
      <map:parameter name="selectedModel" value="{2}" />
    </map:transform>
    <map:serialize type="xml" />
  </map:match>
You can also download the sitemap.xmap file and add it to your project.
D. Prepare Transformation: Download the already implemented XSL transformation to CockpitXML 'modelContentCOCKPIT.xsl' and copy it to 'src/main/resources/COB-INF/transform/'
 www.adoxx.org